I apparently missed yesterday! Whoops. Oh well. It was a bank holiday. Let's just say I was having the day off. Better yet, let me point you in the direction of something I did write yesterday, which was a thorough write-up of Capcom's Pragmata.
And then indulge me while I write two things today, because I feel like I "should". I'm just like that. Also I have just reinstalled Final Fantasy XI and it has to go through its whole many-hours patching process, so I may as well do something to fill the time.
I've decided to give Final Fantasy XI another honest go because I've always enjoyed it when I've played it in the past, I have been wanting to play through its story for more than 20 years (and there's a lot more of it now than when I first wanted to play it!) and I'm sort of "between games" right now. This time around, I want to make a proper effort to get through the main scenario. I know there's a lot of other stuff in Final Fantasy XI, but we'll see if I feel the need to jump into any of that as I work my way through; my priority is just seeing what the main storylines are.
The reason I say this is because I've pretty much made a decision: I'm going to head back into Final Fantasy XIV at some point before the new expansion drops — likely when the new "Beastmaster" job is added in the next main "part" of the Dawntrail finale patch, which is looking like July. Before that happens, I'd like to have had a good crack at Final Fantasy XI, so I'm going to treat it as my "main" game for the immediate future. I think it's going to be interesting — particularly as, for several years now, the game has been in a state where much of it is eminently soloable thanks to the fact you can bring recruitable NPC "Trusts" along with you for pretty much everything in the game, not just instanced dungeons like in Final Fantasy XIV.
As I say, I don't know how much into the weeds I'm going to get, because my main priorities are 1) getting to the level cap of 99 and 2) getting through the main storylines of the base game and all the expansions. The two will likely intertwine somewhat, and gearing up, particularly once at level 99, will likely involve dipping into some of the activities outside of the main story, but we'll see. I'm going to try and minimise guide usage as much as possible, too, because I think that will be much more interesting. I'm also curious to see if it's even possible to play that way — and if it isn't, well, there are 20+ years worth of FAQs, wikis and all manner of other resources out there to follow along with.
I'm excited! I'm also aware that I've fallen off Final Fantasy XI multiple times in the past, not because I wasn't enjoying it, but because something else came along that occupied my attention. Hopefully that won't happen this time around — because I'm increasingly conscious that, because of the game's age, there is likely only so much more time I have to be able to actually do this quest.
So Vana'Diel awaits! In about two hours' time, according to the PlayOnline Viewer, anyway. So how should I occupy myself in the meantime… hmmm?
Want to read my thoughts on various video games, visual novels and other popular culture things? Stop by MoeGamer.net, my site for all things fun where I am generally a lot more cheerful. And if you fancy watching some vids on classic games, drop by my YouTube channel.
If you want this nonsense in your inbox every day, please feel free to subscribe via email. Your email address won't be used for anything else.
Been soloing a bunch of Palace of the Dead in Final Fantasy XIV over the last few days, so I thought I'd assemble some tips for those who are looking to challenge it.
General tips
Take your time on the early floors. You want to equal or exceed the boss' level when you reach it, so clear each floor thoroughly rather than rushing through. You can safely avoid enemies once you hit level 60.
Stay aware of your surroundings at all times. Most floors have patrolling monsters; keep an eye out for these and engage them in the corridors between rooms before pulling the monsters in the rooms themselves.
When fighting on the normal floors, DPS as hard as you can. Summoners, use Garuda-Egi. Tanks, use your DPS stance. The quicker things die, the easier a time you'll have. In most cases you'll probably want to concentrate on one enemy at a time — pull from a distance whenever possible.
When fighting bosses, the priority is on doing mechanics rather than DPSing as hard as possible. Summoners, get Titan-Egi to tank for you. Tanks, use your tank stance.
Drink potions whenever you can if you're not at full health. The last thing you want is to die to a landmine or exploding chest.
Save Pomanders of Serenity for floors where Auto-Heal is disabled. Most of the other floor effects aren't really anything to worry about, but Auto-Heal not working can really fuck you up.
Don't use Pomanders of Safety and Pomanders of Sight on the same floor because they're redundant. Safety removes all traps on the floor, and Sight allows you to see traps and thus avoid them. There's no need to use both.
Pomanders of Alteration are a gamble best used before you hit 60. If they spawn Mandragora-type enemies on the next floor, that's free EXP. If they spawn Mimics, however, you're in for a miserable time.
When using one of the transformation Pomanders, remember that you're not invincible. The Manticore may be able to kill everything in a single hit (assuming Knockback isn't disabled by a floor effect) but its HP and defense are the same as yours in your regular form.
Transformations are immune to Toad traps, and Pacification/Silence doesn't affect the transformation's ability. Landmines are still very dangerous, however, particularly as you can't drink a potion to heal yourself while transformed.
Save Pomanders of Resolution for the floor 100 boss. You'll need all three during the fight.
Enemies to watch out for
Hornets, found in the 1-10 block, have Final Sting, which will do a shitload of damage if you let it go off. You can actually run away from it and avoid the damage if you get far enough away, but it's best to try and kill the hornet before this happens.
Slimes, found in the 11-20 block, cast Rapture if you take too long killing them. This will almost certainly kill you, so kill them as quickly as you can.
Gaze attacks — marked by a very obvious glowing purple eye over the enemy model while they're casting it — can be avoided completely by simply turning your back to the enemy. It's particularly important to do this when dealing with Palace Cobras (petrification), Palace Deepeyes (powerful paralysis) and Palace Pots (Mysterious Light, which causes heavy damage and Blind).
Morbols will show up in the 11-20 block towards the end, complete with Bad Breath attack. Run towards them for the easiest path to avoid the large cone AoE.
Wraiths have a huge AoE attack that causes Terror. If you can stun it, do so. Otherwise, run for dear life as soon as you see the marker appear.
Palace Skatenes will cause Sleep on you shortly after they cast Chirp. This isn't a huge issue, however, since you'll wake up immediately upon taking a hit.
Boss tips
Floor 10: Palace Deathgaze
Pretty easy, and if you've fought basic Deathgaze-type enemies in the game you'll know what to expect. It has a heavy attack called Whipcrack that will do a chunk of damage, so pop a potion after it does this. Stormwind (a large cone AoE) and Bombination (circular AoE) can both be avoided. Aerial Blast covers the whole arena and causes Windburn (damage over time for a few seconds). It will cycle through these abilities until one or the other of you are dead.
Floor 20: Spurge
The Easy Way: Level to 35 or 36, pop a Pomander of Strength and a Pomander of Lust and then just go ham on Spurge and you'll probably kill it before it summons its first set of Hornets if your gear is up to snuff.
The Proper Way: There are two main phases to this fight, and they simply cycle around and around. In the first, Spurge will twat you for a chunk of damage with Bloody Caress, then fling two circle AoE attacks at you — one around itself and one aimed at you. During this time, keep your HP topped up and wail on Spurge as much as you can. The second phase starts when Spurge moves to the side of the arena. At this point, two Hornets will spawn, and Spurge will stay in place, occasionally shooting a large linear AoE attack called Rotten Stench. Avoid Rotten Stench while knocking the Hornets down as quickly as possible — otherwise they will use Final Sting on you — before returning to the punishment on Spurge.
Floor 30: Definitely-Not-Hydra
Pretty easy. When it hits you with Ball of Fire or Ball of Ice, immediately move to avoid the effect of the circular area the attack causes — damage over time for Ball of Fire and slowed movement for Ball of Ice. Keep hitting it while this is going on, and try not to bait any Balls of Fire or Ice into the very middle of the arena. When Definitely-Not-Hydra moves to the centre of the arena and starts casting Fear Itself, stand inside its hitbox to avoid the attack completely. Then repeat the process.
Floor 40: Ixtab
Ixtab will spew void crap over the ground every so often — move out of this to avoid damage. He will then summon two Bhoots which you should kill as quickly as possible to avoid being caught in their attacks. He also has an arena-wide attack that causes Terror, often causing you to stumble into the Bhoots' area of effect if they're still up. Aside from this, not a lot else to say.
Floor 50: Edda Blackbosom
Pay close attention to what Edda is doing. If she uses Cold Feet, turn away to avoid its Terror effect. If she uses In Health, you'll either need to get well away from her or stand right on top of her — react quickly to the AoE marker, but you have plenty of time to get from one extreme to the other if the cast goes off. If you get hit by In Health, one of the letters on the floor will light up. The more of these lit up when she casts Black Honeymoon, the more damage you'll take. Aside from this, she's pretty straightforward. Watch out for In Sickness, which causes Disease and slowed movement; cleanse this off yourself if you can.
Floor 60: The Black Rider
A few things to watch out for here. Firstly, keep out of the large purple circles he drops on the ground at all cost — they cause Bleed, which deals heavy damage while you're in them. Secondly, watch out for the aether sprites he summons around the outside of the arena and don't get caught in their blasts, as these deal extreme damage. Their appearance will often coincide with his charge attack, a linear AoE marker that follows you around. While this is casting, make sure your back is to a "safe spot" away from the aether sprites to avoid being knocked into their blast radius.
Floor 70: Big Snake Thing
I can't remember Big Snake Thing's name, but it's a big snake thing. The most important thing to do in this fight is move Big Snake Thing out of the watery patches it drops on the ground when it casts Douse. While it is in these areas, it gains Haste, which makes it nigh-impossible to avoid Electrogenesis when it casts. Aside from this, Big Snake Thing should cause you no real difficulty.
Floor 80: Definitely-Not-King-Behemoth
This is a daunting fight, but fairly straightforward if you know how to handle all the mechanics. Firstly, when DNKB casts Charybdis, move well away from the AoE marker because it will drop a tornado. Said tornadoes inflict a heavy damage over time debuff if you get sucked into one, and periodically they will suck in everything around them — there'll be a very brief AoE marker to show the effective range of this when it happens, so to be safe don't be anywhere near the tornadoes. Next, when DNKB walks away from you, follow him, because he's about to use Trounce, a massive conal AoE attack that is much easier to avoid if you're right next to him. Thirdly, at around 10% HP remaining, he will begin channelling Ecliptic Meteor, and unlike the other times in the game where this happens, there's nothing to hide behind. Try and kill him before it hits, but don't worry too much if it does — it hits for about 80% of your HP, so if you're topped up before it happens, you'll be safe and free to finish him off after the attack.
Floor 90: The Godmother
This is a bit like the final boss of Pharos Sirius (Hard). Attack The Godmother until a red bomb spawns, at which point you should stun its Blast ability if you can and kill it as quickly as possible while avoiding the AoE markers from the untargetable smaller bombs that spawn around it. When it's down, return to wailing on The Godmother. When a blue-grey bomb spawns, hit it with an instant ability while facing The Godmother to knock it towards her. You want the blue-grey bomb's Hydrothermal Combustion ability to hit The Godmother and interrupt her ultimate attack. From here, simply repeat these two processes until The Godmother is down.
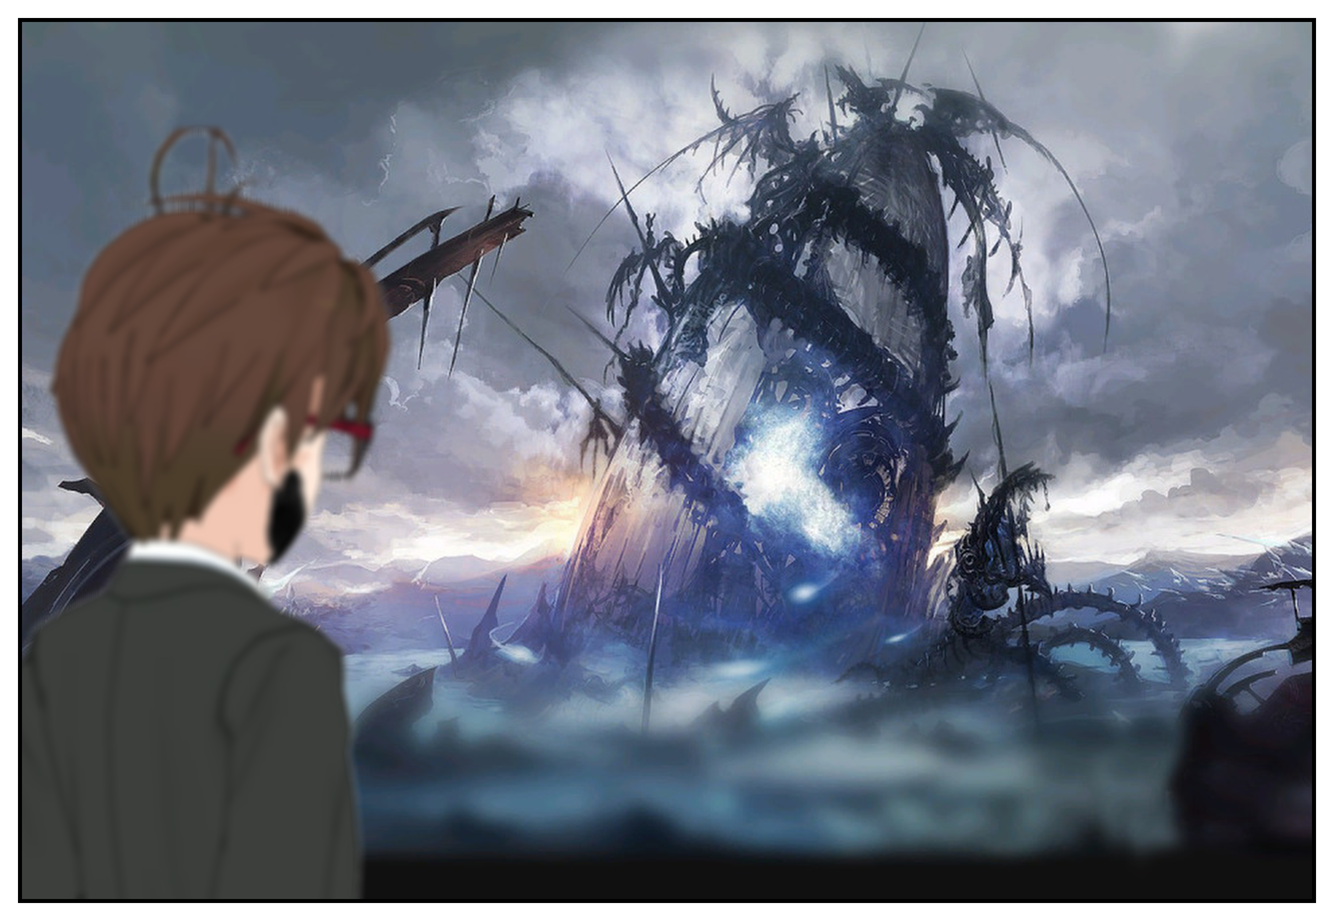
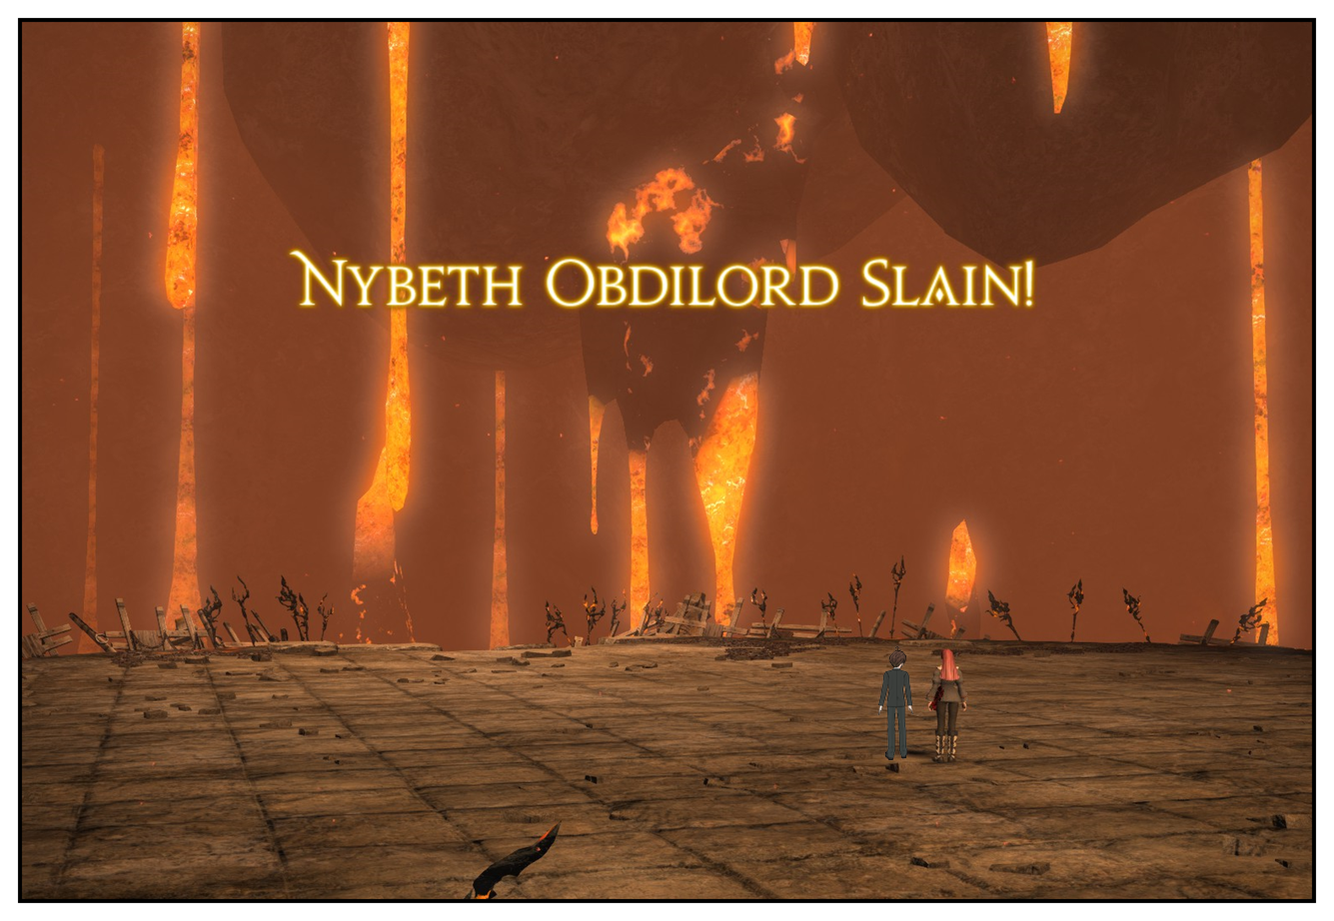
Floor 100: Nybeth Obdilord
Try to make sure you have three Pomanders of Resolution by the time you reach floor 100 — block 91-100 seems to throw them at you, but save them up from earlier blocks to be safe if necessary. Nybeth himself isn't too much of a threat if you take care to avoid his AoEs, particularly the large cone-shaped Doom attack. The important mechanic in this fight is the adds that he spawns at roughly 90%, 70% and 30% of his HP remaining. As soon as they appear, pop a Pomander of Resolution and use Kuribu's attack to firstly kill the enemies, and then use the ability again on their corpses to remove them permanently from the fight. Click off the transformation before you turn your attention back to Nybeth. Repeat two more times and you're home free.
One of the things that had me most interested in patch 3.45 for Final Fantasy XIV was the ranking system for the Palace of the Dead dungeon I talked about yesterday. This tallies a score for you whenever you play with a fixed party (be it solo or up to four players) and thus allows you to compare your progress against other players from around the world.
Alongside the introduction of this ranking system came a few rebalancing changes to make soloing Palace of the Dead a lot more practical than it was when it was first introduced; previously, anything above about floor 20 at a push was very difficult if you were by yourself, but now, you can theoretically go up to floor 100 and beyond if you've upgraded your gear enough and your skills are up to snuff.
One of the things I've appreciated about Palace of the Dead since its launch was the fact that since it's largely impossible to "outgear" it — your regular gear has no meaning inside, only your Aetherpool upgrade levels, and even those are capped and synced if they're too high for the floor you're on and the level you are — you had to actually play properly. That means no cheesing mechanics, no standing in AoEs because you have enough HP to just soak them up, and swift punishment if you don't know how to play your job properly and effectively, sometimes in an unconventional party lineup.
Today, I made it to floor 60 solo, initially using Arcanist to go as far as floor 50 (my Arcanist hadn't yet reached level 30 and thus couldn't be upgraded into Scholar or Summoner, but the experience point rewards from completing these floors were enough to get me from 23 to 30 without too much difficulty) and subsequently as Summoner.
Arcanist/Scholar/Summoner aren't classes I've played much in the past, though I found Palace of the Dead's accelerated levelling to be quite a good way to learn how they work. In particular, levelling Arcanist to 60 without Summoner's extra Job abilities was a solid way to learn the basics of how the class worked, then upgrading to Summoner built on that foundation. I am now regretting the fact that I haven't levelled Summoner prior to today, because goddamn, that class is fun.
The reason I picked Arcanist and Summoner to run solo is that they seemed the most naturally geared towards soloing in that they have the option of summoning a tank pet that can maintain the enemies' attention while you cover them in festering boils and fling magic at them. The tank pet doesn't get a lot of use in party play — largely because you normally have an actual human-controlled tank there that can perform the role better than an AI routine — but in Palace of the Dead, Topaz Carbuncle (Arcanist) and Titan-Egi (Summoner) have both proven invaluable, particularly when it comes to the bosses.
And speaking of the bosses, soloing floors 1-60 today has given me a new appreciation of these fights. When tackled in a party of four, they're mostly rather easy (with the possible exception of floor 80's boss, which has been the source of many a party wipe so far), though from floor 60 onwards they do start to have some more interesting mechanics. Solo, however, they all present a pretty formidable challenge as you have to dodge their mechanics, chug potions to keep your health topped up (assuming you're not a healer) and somehow in the middle of all that find time to fling a few damaging abilities in their direction. I'm sure you can already see how helpful a tanking pet would be in this situation!
Thus far the secret to successful soloing seems to be having decently levelled gear — currently mine is around the +64 mark, which has seen me safely to floor 60 so far, and from this point onwards the upgrades from the silver chests are less likely to fail, too, so repeated runs will eventually push it up towards +99, which I suspect will be strongly recommended to tackle floor 80 and onwards.
According to the leaderboards on The Lodestone, no-one on Primal data centre has made it to floor 100 solo yet. I have little doubt that will probably change by tomorrow — I think someone on Reddit from another data centre had done it already — but for now it's fun taking aim for the top spot. And if I don't attain that top spot, well, at least I'll be able to say I've done it.
I'm going to do a more detailed write-up on this over on MoeGamer when I've read and thoroughly digested everything in this massive tome, but I thought I'd give some initial thoughts here.
Encylopaedia Eorzea is here! Yes, for a long time the Final Fantasy XIV team had been suggesting that a lore book might be on the cards, and at FanFest last week, it was finally revealed. It was put up for sale at the start of this week and seemed to develop a waiting list very quickly; fortunately, I managed to get in early and snag a copy.
£34.99 gets you a formidable hard-backed book over 300 pages in length, printed on gorgeous thick, parchmenty paper and presented in full colour. The book is heavy enough that it would probably do some damage if you smacked someone with it — and you all laughed at Arcanist, Summoner and Scholar's auto-attack!
The tome as a whole is split into eight different "books", each dealing with a different aspect of Eorzean lore.
The first, and shortest, concerns "the basics" of the planet Hydaelyn and what makes Her tick, including geography, the relationship between Hydaelyn's light and Zodiark's darkness, the Twelve gods in the Eorzean pantheon, and the basics of "aetherology" — the underlying (fictional) science of how the elements interact with one another to create life, magic and other effects.
The second, and one of the longest, concerns Hydaelyn's history, reflecting on the world's cycle of Astral and Umbral eras, with the latter's arrival being heralded by a Calamity of some description — each elementally themed in the case of the first six, and the seventh (used as the initial story catalyst for A Realm Reborn) covering all elements in the sheer magnitude of its disaster. This book is particularly interesting because it gives some background reading on the mysterious ancient civilisations of the Amdapori, the Mhachi and the Allagans, all of whom are explored to a certain degree in the game itself. It also provides a good primer of the storyline for Final Fantasy XIV 1.0, which is no longer playable, but which is concluded through A Realm Reborn's cycle of raid dungeons, The Binding Coil of Bahamut, The Second Coil of Bahamut and The Final Coil of Bahamut.
The third book provides a primer on the different people of Eorzea and where they came from. It only explores the playable races of Hyur, Elezen, Lalafell, Miqo'te, Roegadyn and Au Ra — those hoping for some information about the Padjali or a hint as to whether or not we'll ever see Viera in the game will have to keep theorycrafting.
The fourth book is the longest and concerns the geography of Eorzea, including all the zones from A Realm Reborn and Heavensward as well as short look at Ala Mhigo (subject of the upcoming expansion Stormblood) and the Garlean Empire (recurring villains).
The fifth book concerns Hydaelyn's "servants", and explores the various characters that you come into contact with throughout the game, right from the main "protagonists" the Scions of the Seventh Dawn to the recently introduced Warriors of Darkness. This section also includes information about groups involved in sidequests in the game, too, such as Hildibrand's Agents of Inquiry, the organisation NOAH who spearheaded the investigation into the Crystal Tower and a section entirely devoted to more minor NPCs such as those who served as the face of the Relic quests, and poor old Edda, who has had a rough ol' time of it both during life and in death.
The sixth book looks at Hydaelyn's "disciplines" — in other words, the playable classes in the game. Interestingly, the book makes no mention of the base classes on which the more familiar "Jobs" are based; the focus is entirely on the higher-level incarnations of the Jobs.
The seventh book concerns Hydaelyn's "burdens" — the various beast tribes of the realm, and the Primals associated with each of them. This section also looks a little at as-yet underexplored groups such as the gigants, as well as the eikons of the Warring Triad, which we're halfway through the story for in the game at the time of writing.
The eighth and final book is a bestiary of monsters from around the realm, divided into the various "-kin" categories. It also incluides a look at voidsent, elementals and chimeras.
There is a lot of information in this book, and it's presented in a clear, enjoyable to read manner. The thing I've found most beneficial about it is that it provides a good summary of the various storylines that have unfolded during the game since its launch; this is several years ago now, so it's not surprising that some details may have slipped many players' memories! The lore book acts as a good reference guide for those who may have forgotten some of the finer details.
Above all, though, Encyclopaedia Eorzea is clear evidence that the team behind Final Fantasy XIV have built more than just a game. They've truly built a world for people to inhabit, which has its own history leading up to today, as well as many more stories yet to tell. And if you flip through it's pages, you'll understand just why so many people still like to call Eorzea home.
Final Fantasy XIV's patch 3.45 is coming in early November, and bringing with it an additional 150 floors to the game's current Deep Dungeon, The Palace of the Dead. I am excited.
Palace of the Dead is a great piece of content that I'm pleased has remained popular since its launch. It flips most of the conventions of MMOs on their head and provides something different for people to do, with meaningful rewards and a decent shot of experience points for those levelling alt classes.
Palace of the Dead, in case you're unfamiliar, is a 50-floor dungeon that you tackle in blocks of 10 floors at a time, with a boss on each 10th floor. Each floor consists of a number of rooms arranged in a randomised layout, with an exit portal in one room and a resurrection gizmo in another for if things happen to go south and you don't have a healer. Both of these things are inactive at the start of a floor, so you have to kill enough enemies to turn them on before they can be used.
Some rooms have treasure chests and occasionally monsters drop them too. These come in three different varieties: bronze chests hold consumable items such as Phoenix Downs to resurrect fallen comrades and potions to heal HP; silver chests have a chance to upgrade either your weapon or armour (with the chance getting smaller as they get more powerful) up to a maximum of +30; gold chests reward you with "Pomanders", which are items that have immediate beneficial effects such as increasing your damage, turning all enemies in the nearby vicinity into chickens or frogs, temporarily transforming you into a manticore or removing all the hidden traps on the current floor.
In the last major patch, the Accursed Hoard was also added to Palace of the Dead; these are hidden treasures that have a chance of spawning on each floor. Standing on a spot where a Hoard is hidden reveals it, and if you successfully clear the block of 10 floors, you get one sack per Hoard you found, each of which contains a randomly drawn item from what seems like quite a large selection, ranging from the useless (fireworks) to the very useful (grade V materia) via formerly expensive glamour items.
The thing I like about Palace of the Dead is it takes almost everything the rest of Final Fantasy XIV established in terms of gameplay and throws it out of the window. Item level doesn't matter, stats don't matter and even conventional party composition (one tank, one healer, two damage-dealers) doesn't matter. There's some variation in individual performance according to the upgrade level of your aetherpool gear (which you can only use in Palace of the Dead until it reaches its fully upgraded level of +30, at which point it can be exchanged for a level 60, item level 235 weapon that you can use in the rest of the game) and your character level in Palace of the Dead (which is different to your character level in the rest of the game; you level up at a considerably accelerated rate in the dungeon, but have to reset to 1 every time you restart from floor 1) but otherwise, how well you do in there is entirely down to how well you know how to play your class.
It's interesting to see people realising this for the first time. You can't just ignore mechanics in Palace of the Dead because it's literally impossible to outgear it. You can't stand in area-effect attacks and soak the damage because, again, you can't outgear it. And you can't pull 30 enemies at once and hope to survive because, you guessed it, you can't outgear them. It's all about careful use of your abilities, consumable items and the Pomanders; you have to be constantly aware of the situation of both yourself and your party members, as an unfortunate mistake could lead to a wipe — and if you wipe in Palace of the Dead, you fail that set of floors immediately and have to start again from the last "checkpoint" you reached. (This is particularly heartbreaking if you reach the final boss on floor 50 with 5 Accursed Hoards in your pocket and then wipe because you forgot to pay attention to mechanics.)
The reason I'm looking forward to Patch 3.45 is that it promises not just more of Palace of the Dead, but that its last 100 floors in particular will be very difficult. And not "very difficult" in the sense that the current Savage raids are very difficult — i.e. they get quite a bit easier if you take the time to buff up your gear level — straight up difficult in that you'll have to pay attention, dodge shit and play your class effectively, perhaps in an unconventional party formation.
I'm interested to see quite how they're going to make it difficult. People have been clamouring for difficult ("Savage") four-player content for quite some time now, and Yoshi-P and the team specifically said during the last Live Letter that the lower 100 floors of Palace of the Dead were designed to be just that. What I find particularly interesting is that this is (hopefully) super-difficult content that you don't need to have spent ages preparing to be ready for, because your gear level when you go in doesn't matter; everyone in the entire game, assuming they have Palace of the Dead unlocked (which they can do as early as level 17 rather than having to reach the current cap of 60), has the potential to be a "world first" clear, which is something that has never happened before. Previous "world firsts" in the game were by raiders who were at the absolute top of their game with the best possible gear available, so in most cases it was fairly predictable who the acclaim would go to. With this, however, the title is anyone's.
I'm also intrigued by the proposed ranking system and how it works, since that hasn't been explained in much detail before. We know that there will be rankings for both individuals and parties, and that rankings are stratified by class/job, but we don't know exactly what causes you to score the "points" that determine your place on the rankings. Progress through the floors is a given — the mockup leaderboards we saw during the Live Letter displayed both the floor the characters had got to and their score — but what else will contribute to it? Clear time? Damage done? Kills? Accursed Hoard finds? Treasure chests looted? All of the above?
If they handle this properly, Palace of the Dead has the potential to become an enormously compelling metagame in its own right within the wider context of Final Fantasy XIV, not to mention a great way to learn and level alt classes that you perhaps haven't used much before. I'm very much looking forward to challenging the lower floors of this Deep Dungeon, and hope that it provides a suitable alternative to raiding for those who seek a challenge but perhaps don't have a group, have difficulty getting everyone together at the same time, or simply aren't geared enough.
I guess we'll see soon enough! (Also, I really want to see what happens when you sit on that bench…)
Since I appear to be on a Final Fantasy XIV roll at the moment thanks to the excellent new patch, I thought I'd devote today to some of my favourite tunes from the game as a whole.
I respond very strongly to music that I enjoy — so much so that any time I think about hanging up my Eorzean adventurer's shoes for good, it's pretty much always the music that gets me coming back time after time. Or, if it's not the only reason, then it's certainly a leading reason as to why I keep coming back.
So let's look at some great tracks from the game.
"Patch 3.4 boss theme"
I don't know if anyone knows the actual name for this theme yet, but it's an excellent one. It seemingly became tradition with A Realm Reborn that the last couple of patches in a cycle would use different boss music from the ones we had been enjoying previously, and Heavensward is continuing — or, perhaps more accurately, confirming — this tradition.
This boss theme mixes two important themes from the game as a whole: Heroes, which we'll come to in a moment, and Penitus, which we'll also come to in a moment. To put it another way, it mashes together one of the most recognisable musical motifs from Heavensward with one of the most recognisable musical motifs from A Realm Reborn to produce a track that very much feels like a "reward" for people who have at least been playing since 2.0.
Heroes
This theme, played during vanilla Heavensward's final boss fight against King Thordan and Knights of the Round, brought the already exciting story of FFXIV's first expansion to a climactic head. While the fight was a bit easy even when it first launched, people still enjoy running it today just to enjoy this music and the spectacular graphical effects throughout the battle.
Penitus
I was already thoroughly wrapped around this game's little finger by the time I got to level 50 and was faced with the two 8-player story dungeons that wrap up vanilla A Realm Reborn's storyline, but getting into Praetorium and hearing this wonderful piece of music — snatches of which had been heard in a variety of different styles right the way through from level 1 all the way to 50 — got me absolutely hyped to see the story through to the end.
Ultima
And then the game goes and throws this incredible track on you for the Absolutely Definitely Last Boss, Yessirree (Not). I'll let this one speak for itself.
Thunderer
Ultima is followed by this little wonder featuring one of the best key changes ever. Sadly the first time you hear it, it doesn't last anywhere near long enough because everyone absolutely obliterates the Real Final Boss, Definitely Totally For Real This Time in a matter of seconds these days.
Thankfully, Square Enix clearly knew they were on to a good thing with Thunderer, as it was reused in a couple of places — most notably in the Chrysalis trial which was added in one of the content patches, and, for many people, its most iconic appearance in Turn 5 of the Binding Coil of Bahamut, in which you fought the dread dragon Twintania, and which in the game's vanilla release acted as the "true" final boss. (Of course, this later all changed with Second and Final Coil, but still.)
Footsteps in the Snow
Shiva was one of my favourite Trials to be added to the game almost entirely because of this excellent piece of music that opened the fight and ran until the phase change. This music was first heard in the trailer for patch 2.4, Dreams of Ice, and got everyone well and truly hyped.
From the Ashes
Raid dungeon The Final Coil of Bahamut was, for many players, a highlight of the game due to its fascinating story — which, unlike the narrative of A Realm Reborn itself, which span off in a different direction, followed up on how Final Fantasy XIV 1.0 ended. Turn 12, the penultimate turn, is often cited as a particular favourite by many players simply due to this unique music, which was a highly dramatic, spine-tingling take on A Realm Reborn's main theme song Answers. The whole of The Binding Coil of Bahamut had featured music based on Answers, and this track felt like it was bringing everything to a dramatic conclusion.
Answers
And, having mentioned Turn 12, it would be remiss of me not to mention the way Answers was used in Turn 13, the absolutely definitely positively totally final boss of the game, or at least of the raids. I present it here in context, including battle sound effects, to show how it is used in the fight itself. The incredible crescendo during Teraflare is made of goosebumps.
I'm yet to do the new Alexander raid — my item level isn't quite high enough yet — but I understand the grand finale is suitably spectacular. T13 is going to take some topping, though.
Spent a bit more time with the non-story aspects of FFXIV's 3.4 patch Soul Surrender today, so here's a few thoughts with that in mind.
First up, I finished my first Wondrous Tails journal, albeit rather poorly, so I have a good handle of what that's all about now.
Wondrous Tails is a new weekly quest where you acquire a journal from the adorable young Miqo'te Khloe Aliapoh. Khloe wants to hear all about your adventures, so you agree to help her out by filling in her journal with tales of some of your exploits. You are then presented with 16 different challenges for the week, nine of which you need to clear to complete the journal.
On the opposite page to the challenges you are to face is a 4×4 grid of blank spaces for stickers. You acquire these stickers by completing the challenges — one per challenge, though you don't get to choose which sticker you get. Fill a line in the journal and there's a reward separate from the one for completing 9 challenges. Fill two lines and there's another reward. Fill three and there's another still. These rewards are significant, at higher tiers consisting of Allagan Tomestones of Scripture, the current "top end" endgame currency, and even item level 250 armour which, while not the best in the game at the moment, is certainly pretty good.
They are not, however, easy to accomplish, as I've discovered this week. It's not completely random chance as to whether or not you fill some lines — by helping new players complete duties for the first time, you earn "Second Chance" points, which can be used in one of two ways: firstly, to mark a completed challenge as incomplete while marking an incomplete one as complete. This effectively allows you to do something again while removing the need to do something you don't want to do. You can choose the complete challenge to make incomplete, but not the incomplete challenge to make complete. Alternatively, you can spend two Second Chance points to shuffle the entire board of seals (including the ones you've already placed) in the hope that you will get a more advantageous arrangement. In order to make three lines with nine seals, you need their placement to be absolutely perfect — a horizontal, a vertical and a diagonal. As such, it's a bit of a gamble that you can't necessarily rely on.
I gambled and failed, ending up with no lines at all by the time I had nine seals — you can only use the shuffle option when you have between three and seven seals, so you can't just shuffle a completed board around. Still, I at least got the reward for completing the journal for the week, which is meaningful in itself, and there's always next week to try again.
Next up, I jumped in to the randomly generated Palace of the Dead in an attempt to finish my Aetherpool weapon and get something to take the place of my outdated i210 Anima weapon until I can finish the upgrade process. New to Palace of the Dead in this patch is the addition of the Accursed Hoard, a series of hidden treasures that can only be located by using Pomanders of Intuition, which last until you unearth a piece of the Accursed Hoard. Your party banks the pieces of the Hoard until you complete the tier of the Palace that you're on, and like everything else, if you party wipes you lose them.
Assuming you successfully completed a tier, each piece of the Hoard the party acquired will reward you with a sealed sack which must be taken to a new NPC in Quarrymill to appraise. There then follows a gacha-style appraisal sequence, during which you can anticipate how good the item you're about to get is via the animation that plays (or not!) during the appraisal sequence. There are some decent items available through this system — in my first batch of three sacks, I got a paissa minion, the expensive Thavnairian Bustier top and a firework. In the seven other sacks I acquired throughout the evening, I got more fireworks. It seems fireworks are the default "normal" draw, at least from the common bronze sacks, but there seems to be an above-zero chance of getting rare items from this, too, making Palace of the Dead a worthwhile activity for reasons other than acquiring the weapon.
There's obviously a lot of RNG in both of these systems that I've described, and some people don't like that, preferring a predictable goal that you can take aim for and always see your progress towards. Final Fantasy XIV has always been heavily RNG-driven, however, and so these two systems, while having the potential for enormous frustration, are firmly in keeping with what we've come to expect from the game to date!
Final Fantasy XIV patch day has come and gone, so I thought I'd share a few thoughts. I'm going to mostly talk about the Main Scenario quests in this post, so I'll put in a Read More link for those browsing the front page who don't want to accidentally see spoilers.
The first MMO I really got into was Final Fantasy XI. This was after a few previous aborted attempts including EverQuest and Ultima Online (over dial-up — not recommended, particularly EverQuest, which crashed every time I zoned) as well as slightly lesser-known titles like Dark Age of Camelot.
I never stuck with the earlier games because they never quite resonated with me for one reason or another — perhaps it was their clunky interfaces or their painfully slow progression. All I know is that Final Fantasy XI, despite also having a clunky interface and painfully slow progression, managed to capture my attention for a decent period of time before I finally moved on to something else — Final Fantasy X-2, as I recall — and never went back.
Just recently, some Final Fantasy XIV friends and I have been getting nostalgic for XI, so I thought I'd go check it out, given that it's been a number of years and several expansion packs since I last tried it. And while the game is still recognisable as what it once was — a steadfastly traditional MMO more in the EverQuest mould than the now more fashionable WoW mould — it's been considerably streamlined to make the experience much more friendly to new players and solo players. On top of that, players now have a hefty amount of options to choose from when they log in and want to decide what to do next. This is not something Final Fantasy XI was ever lacking in, but the additions and refinements that have been added to the formula over the years benefit both new players and grizzled veterans.
Take the Fields of Valour and Records of Eminence systems, for example.
The former sees you examining "field manuals" in each zone and taking on a training regime of your choice. Completing said regime rewards you with experience, gil and a currency called tabs that can be traded in for various benefits ranging from teleporting back to your home city — a godsend if you've been grinding several zones away, since fast travel isn't anywhere near as accessible as it is in XIV — to having temporary buffs cast on yourself.
The latter, meanwhile, is accessed through your Quests menu and allows you to assign yourself up to 30 objectives at a time from an extremely comprehensive list of possible challenges that range from "defeat 100 enemies" to "deal 100,000 points of damage in total" via "loot 10 wind crystals from enemies". Most of these objectives are repeatable, and all reward you with experience points upon completion.
Just the addition of these two systems, which support the existing style of play FFXI veterans will be used to, makes levelling a considerably less painful, time-consuming process. What once took weeks of grinding can now be done in a few hours — to put it in context, I played for about 2 or 3 hours earlier and made it to level 16. First time I played this took me several weeks to achieve; in several months of play I never got any further than level 30.
It's a bit of an adjustment to go back to XI after the tightly structured gameplay of XIV. XI, by contrast, is much more freeform; there is a main storyline to follow, but it's of considerable benefit to players to go out and level up a bit first before even thinking about tackling these missions. The story can even be ignored completely if you'd rather just go out hacking and slashing monsters, unlike in XIV, where it was an integral part of overall progression by gradually unlocking game features and challenges as you went through.
One of the best additions to XI in recent years is the Trust system, which allows you to recruit "alter-ego" versions of various NPCs from around the game world after meeting the requirements to unlock them. Once unlocked, these "alter-egos" can be summoned at any time in the field for you to party up with, effectively allowing you the ability to take on considerably stronger monsters than you would otherwise be able to tackle solo, and all but eliminating the need for standing in Valkurm Dunes for hours at a time shouting "RDM LFG" in the hope that someone would pick you up to go and kill lots of crabs with.
One might say that the Trust system takes away from one of the key defining aspects of FFXI as a massively multiplayer online game, but in practice it's simply more convenient for many players. You still have the option to party up with other people, of course — and chances are they'll play their roles much better than the relatively limited AI of the Trust companions — but for those who prefer to play solo, Trust NPCs can form a formidable party with you once you've unlocked a few of them.
The other interesting contrast between FFXI and FFXIV is how it handles combat. XI's combat is relatively simple in the early levels, relying mostly on your auto-attack and occasional use of Weaponskills when your TP bar hits 1000 or greater. XIV, meanwhile, is much more active, demanding that you both dodge enemy attacks with telegraphed areas of effect and keep performing your class's combo or rotations as efficiently as possible, preferably without stopping. Both are considerably slower paced than true real-time combat, striking a good balance between a turn-based feel and actually allowing the player to feel like they are in full control of their character, but XI is even slower than XIV, providing you with plenty of time to pick abilities in advance from its traditional FF-style menu system rather than XIV's hotbars.
I've enjoyed returning to Vana'Diel so far; the experience contrasts well enough from XIV that the two games can sit quite comfortably beside one another in a gamer's collection, and the state they're both in in 2016 means that you can sit down for either a long or a short session with either and feel like you've achieved something.
Mostly I'm wanting to play through Final Fantasy XI to see its main story content, which is supposed to be good, but the sheer amount of stuff to do in the game — it's got over ten years on A Realm Reborn, after all — is more than likely to prove a bit distracting!
With it being Final Fantasy XIV's third anniversary it's only fitting that I take a look back at the reason I've been playing it since its closed beta — and why, even though on several occasions I've felt like I might be "done" with the game, I keep on coming back, time after time.
These memories are presented in no particular order, but it makes the most sense to start with this one.
Knowing FFXIV was going to be something special
I jumped into Final Fantasy XIV's closed beta after a casual discussion with a Twitter friend about Final Fantasy XI and how much I liked it despite never really getting all that far with it. Eventually I found myself with an invite to the testing period of the game, and I was immediately smitten with it. Everything about it felt Final Fantasy. The look, the feel, the music, the controls, the battles, the monsters — and yet, it had enough of its own unique identity to make it feel like far more than just series fanservice.
Specifically, Final Fantasy XIV adopts a somewhat "dark fantasy" tone throughout, clearly heavily inspired by works such as Game of Thrones and The Witcher in places. Sure, there are still moogles and chocobos, but there are also complicated political machinations, betrayal, murder and, technically, just prior to the start of 2.0's story, apocalyptic catastrophes.
I was immediately drawn into the world in a way that World of Warcraft never quite managed to enrapture me. NPC dialogue, although localised with more than a few liberties taken from the original Japanese, much to the chagrin of people who play with Japanese voiceovers, was beautifully written with an almost Shakespearean tone in places, blending old- and middle-English words and phrases with modern spellings to make it actually comprehensible.
The fact that Final Fantasy XIV placed any emphasis on its main story at all — let alone to the degree that it has ended up doing so — was a unique feeling for me. Even its predecessor Final Fantasy XI's main story had felt like a side activity you did when you had done enough level grinding to be able to take on the next mission; here, the main story was tightly tied in with your character's progression: you advanced through the levels and became more powerful both in terms of mechanics and narrative, until you eventually reached level 50 and took on your most terrifying challenges yet.
During the closed beta, I only played up to about level 20 or so, but that was enough to know that I wanted to keep playing — and to know that I wouldn't mind when the servers were wiped post-beta to prepare for the start of live service.
Making some great friends
My friend who had urged me to try out FFXIV was all set to assemble a Free Company — FFXIV's take on guilds — as soon as the facility became available, and many members of that free company, centred around the Giant Bomb video games website, became great friends. I even took a trip to PAX East to hang out with a bunch of them and had an absolute blast. And while I recently left said Free Company in favour of a smaller group who are more local to where my wife and I are, FFXIV's various ways of keeping in touch — as well as extra-game means of communication like Discord — mean that I'll never be far away from this band of loveable rogues.
Castrum and Prae keeping me up until 5am
When I reached level 50, I was proud. The only other MMO I'd ever reached the level cap in prior to that day was World of Warcraft, and I'd stopped playing shortly afterwards, as my lack of friends playing had made that game a rather lonely experience at high level — this was the days before its current Dungeon Finder system, itself inspired by FFXIV's Duty Finder.
I'd heard the final two story dungeons, intended to be done pretty much as soon as you hit 50, were quite an experience, and so I asked the Free Company very nicely to accompany me on my first run through them. This was — and still is — the best way to run these dungeons, since they're both full of cutscenes, and running with a completely preformed party means no risk of other people running ahead and starting boss fights while you're still watching dramatic scenes.
The experience of running Castrum Meridianum and Praetorium left such an impact on me that I immediately wrote about it on USgamer. It remains one of my fondest gaming memories to date, and it makes me a bit sad that people coming to it now will more than likely be partied up with a group of people who outgear it to such a degree that every boss fight is a complete steamrollering. Pro-tip, then — if you're just hitting 50 for the first time and you have 7 friends handy, queue up for Castrium then Prae and check the "minimum item level" option in Duty Finder in order to experience these two dungeons at their original difficulty level from shortly after launch.
Entering the Coil
I happened to be up and about one night when some Free Company-mates were heading into the endgame raid dungeon The Binding Coil of Bahamut. At this point, the raid had been "unlocked" because better gear than it offered was already available, and so it was there for people to run just for the experience of the unique story it offered, as well as unlocking subsequent chapters.
Coil was a whole other level of the game for me. The encounters were much more complex, they demanded much more coordination and awareness of what was going on, and the unique story, music and enemies you fought in there made it feel like a truly "special" experience.
Forming LoCoBomb and tackling Coil proper
Loose Cannons, or LoCo, were Giant Bomb's neighbours in the Limsa Lominsa housing district of Mist, and they're now my new Free Company. LoCo is a tiny little group compared to the hundreds of members of Giant Bomb (many of whom are inactive players, but still) but we struck up a mutual friendship with one another, even going so far as to put together a rather casual, slapdash static for tackling The Binding Coil of Bahamut, a little later than much of the rest of the player base, but tackling it nonetheless.
Raiding together was a great way for us to get to know one another better, and we had a lot of fun times working out way through the first four Turns until we hit our first real barrier: Turn 5.
Toppling Twintania
Turn 5 of Coil was originally the hardest fight in the entire game, facing a party of 8 players off against the rather angry dragon Twintania. Accompanied by the fantastic piece of music Thunderer, this was a genuinely terrifying confrontation in which you really felt like you were battling against insurmountable odds.
Twintania was our first real encounter with having to properly coordinate raid tactics thanks to now-notorious mechanics such as Divebombs and Twisters. Taking her down for the first time was an incredible feeling, only to be matched by the time we finally bested the final boss of the Second Coil of Bahamut.
Nailing Nael
Turn 9 of Coil — or Turn 4 of Second Coil, if you prefer — quickly took over from Turn 5 as being the hardest fight in the game, mostly due to how unforgiving it was. The fight featured a wide variety of tasty instant death mechanics and even a few sections where careless play could wipe the rest of the raid without too much difficulty.
After a long slog through Second Coil — Turn 6 gave us a lot of grief, though the subsequent two went a little smoother — LoCoBomb persevered and were eventually victorious, however, and we still weren't sick of the two incredible boss themes Tempest and Rise of the White Raven.
This encounter remains, to date, my favourite boss fight of all time in any game ever. Ten character levels, over a hundred item levels and one expansion later and it's still not particularly easy to clear.
Phoenix from the Flames
A lot of people will note that Turn 12 — Turn 3 of Final Coil — is as memorable an encounter as the grand finale Turn 13, and I'd certainly agree with that. Resolving a large number of questions surrounding what really happened at the end of Final Fantasy XIV 1.0, Turn 12 sees the party facing off against the iconic Phoenix, accompanied by this magnificent arrangement of the game's main theme Answers. I still get shivers every time I hear it. And the recent The Rising event in the game now brought it out at the perfect moment to genuinely give me goosebumps all over my body.
The Final Witness
The final battle in Final Coil is appropriately spectacular. It wasn't horrendously difficult by the time we got to it — each subsequent patch had increased the amount of bonus HP and damage you'd be blessed with when you went in, theoretically allowing more and more people of lesser skill and/or gear to enjoy all of Coil's story — but it was still an immensely worthy absolutely, positively, definitely final boss. And it made incredible use of Answers.
An in-game marriage and a real-life proposal
(if the embed doesn't work, go here to embarrass me)
January 3, 2015: Amarysse Jerhynsson married W'khebica Qimi (now Wuckle Bunny, because no-one can spell authentic Mi'qote names properly). During this process, the player behind Amarysse Jerhynsson — yours truly — made a rather lengthy virtual speech that culminated in him proposing to the player behind W'khebica Qimi, who was sitting in her study upstairs from him at the time.
We married in June 2015. And who says computer games are antisocial?
Heavensward and beyond
The first full expansion for Final Fantasy XIV was an exciting moment, as it would take us to brand new areas, see us tackling brand new dungeons and battling fierce new foes. It was everything most people hoped for, with an excellent story — to some, better even than A Realm Reborn's at times meandering narrative — and one hell of a final boss fight.
While the long lull between Heavensward's release and the first major content patch finally arrived with us was, I feel, largely responsible for the fact that my former Free Company are no longer quite as obviously "active" (at least in public channels) as they used to be, Heavensward has, on the whole, been a great evolution of A Realm Reborn's base, even introducing a number of brand new types of content to the mix, with my favourite being the new randomly generated Deep Dungeon.
Heavensward's raid scene hasn't appealed that much — I'm not really a fan of steampunk in general, and the narrative set up around Alexander was feeble and unmemorable compared to the majesty of Coil — but there's still been plenty of stuff to do, and as we saw with the Live Letter yesterday, there will continue to be more and more stuff to do as we start the buildup to the second full expansion, set to be revealed for the first time in October.
It's not many games you can play almost continually for three years and still look upon fondly, but I guess anything you spend that much time in the company of eventually becomes something you really, truly can't ever let go of.
It's hard to get this across to people who haven't been on the journey I've been on, and it probably won't be quite the same for someone who starts right now, but I stand by my nomination of Final Fantasy XIV as my Game of the Year for 2013 over on USgamer, and given the number of hours I've played, it's probably my GotY for 2014, 2015 and 2016 too.